We were given a class demonstration by Laura Cotterill on beauty makeup, specialising in makeup for brides. We were taught all the basic techniques for all types of skin colour from natural weddings looks to full face high fashion makeup, false lashes and all included.

Pinterest. 2014. Pinterest. [ONLINE] Available at:http://www.pinterest.com/search/pins/?q=wedding%20makeup%20. [Accessed 16 December 2014].
Bridal Makeup (for black brides)

Here are the images i took during the demonstration by Laura. She used Olivia as a ‘bride’ for this tutorial.
- Use softer colours for the eyes, by adding a little definition to the socket, same process of lightly applying shadow along the eyes. Add darker colour along the eye crease again not a lot of product but enough for definition a colour between the dark a medium all over the eyes. Do eyes before skin for bridal.
- Add liner along the water line, as well as eye shadow and blend in. Add shimmer to the centre of the eye lid, preferably cranberry colour
- Prepare the skin: Use a warm colour around the face as a darker model is warm around the face. Beauty blender, wet the sponge first. Blend the drier colour around the face with the beauty blender. Only use foundation for bridal makeup. Use a clean blending brush as well for a nice even finish.
- Add concealer (mix different colours together) use as foundation around the nose area and cheeks bring the concealer right up under the eyes and up towards the temples. Lighter cream concealer for highlighting under the eyes
- For black (dark) skin use yellow banana powder under the eyes and highlighting areas for lightening the skin. Puff into the skin
- Pink and peach blusher to warm the skin up
- Lips: line the lips with natural lip liner (skin like colour) Freckle tone lipstick nude mac colour for natural lips for black and mixed race person (looks more natural on these skin types can be used on white skin tone as well though)
- Brows: use eyeshadow to fill the brows, by warming them up. If the model has very little brows on the end draw them in with a small eyebrow pencil
- Darker bronzer, red and golden tones for black skin

- Skin prep- moisturise the eyes with eye cream, lip balm, primer (for oily skin types use a matte finished moisturiser) primer with colour (rose pink from Mac)
- Matching the colour (foundation) 1 and half lighter than natural skin by the time of adding blusher bronzer it will build the colour up
- Cream concealer mixed with skin body foundation (mac 159 brush is nice for this effect)
- Natural coverage of foundation and build up with concealer
- Adding the foundation to the centre of the face (Don’t apply a lot of product on to skin, Use a clean brush to blend evenly)
- Eyes: natural eye primer all over the eyes right up to the brows (brush roughly all over the eyes)
- Add colour (smokey eyes) (If the model doesn’t have a eye crease use a pencil brush to create a natural crease)
- Eye brushes: pencil brush, 2 types of blending brush 224 219 217 mac brushes
- Mid tone colour for middle of eyes. Fan over the crease eye socket, follow the natural crease blending the product. Work it up to the brow. Use circular motion
- Add in darker colour again follow the crease, darker colour with the pencil brush follow the lash line and underneath along the water line (half way along the lines) add a lot of product close to the eye to make an almond shape, use a wet wipe to remove any access under the eyes but remove in a almond way making a sharp flick to the eye. Again add a darker colour along the eye lid by pressing the colour then blend with a blending brush
- Concealer around the eyes and brows use a lip stick concealer dot around the eye area (under the eyes) (lighter colour to foundation, couple of shades lighter) up and around the brows with the lighter colour
- Main point to highlight- brows, chin, under the eyes, temples, upper lip. Red tone concealer to warm the lightened area (look into the colour wheel for different skin tones)
- Clean brush to blend everything again (face not eyes)
- Warm skin, big bronzing brush create a halo around the face with a mineral colour follow through up to the cheeks
- Contorting- Sculpting powder, sleek flat contour brush 163 draw a line along the cheek. Follow by blending the colour in with another big blending brush
- Contour the nose lighter bronzer with a cool (light brown) eyeshadow inside of the brow to middle of the nose bridge go back in with the concealer brush and cover the lines
- Brows: strong brow use gel liner (war brow gel) to groom the brow, use a brow brush to achieve a bushy look, apply gel along the bottom of the brow sketching up, warms up the brow as well dip down brown, deep brown eyeshadow to fill the eye shadow. Comb the brow upwards
- Highlight: highlight the face with loose pigment/shimmer. Press onto all the highlight areas (powder to catch the light)
- Lips: red lip hydrate the lips before hand. Push a lot onto the lips and use your little finger as a guide colour the lips with the pencil half way. Use a red lips stick all over the lips ruby roo. Matt colour.
- Eyes: Use a lot of mascara (YSL baby doll)
- Brows: highlight the brows just the the eyes brown bone, use a. Blending brush to finish off
- Lastly finish the eyes with the middle tone colour to add definition to where we highlighted
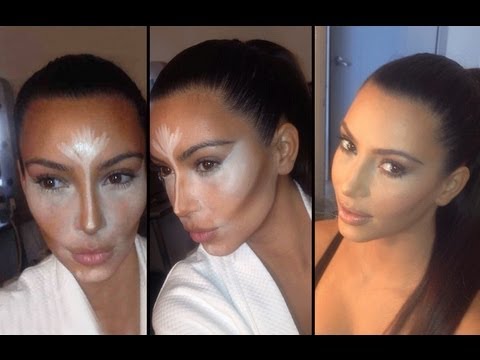 What does contouring
Contouring plays such a big part in makeup regime for shoots and events. Many incredible makeup artists over the world all use contouring to define and shape the face. It’s an amazing way to shape your nose, define your cheeks and create highlights and shadowing!
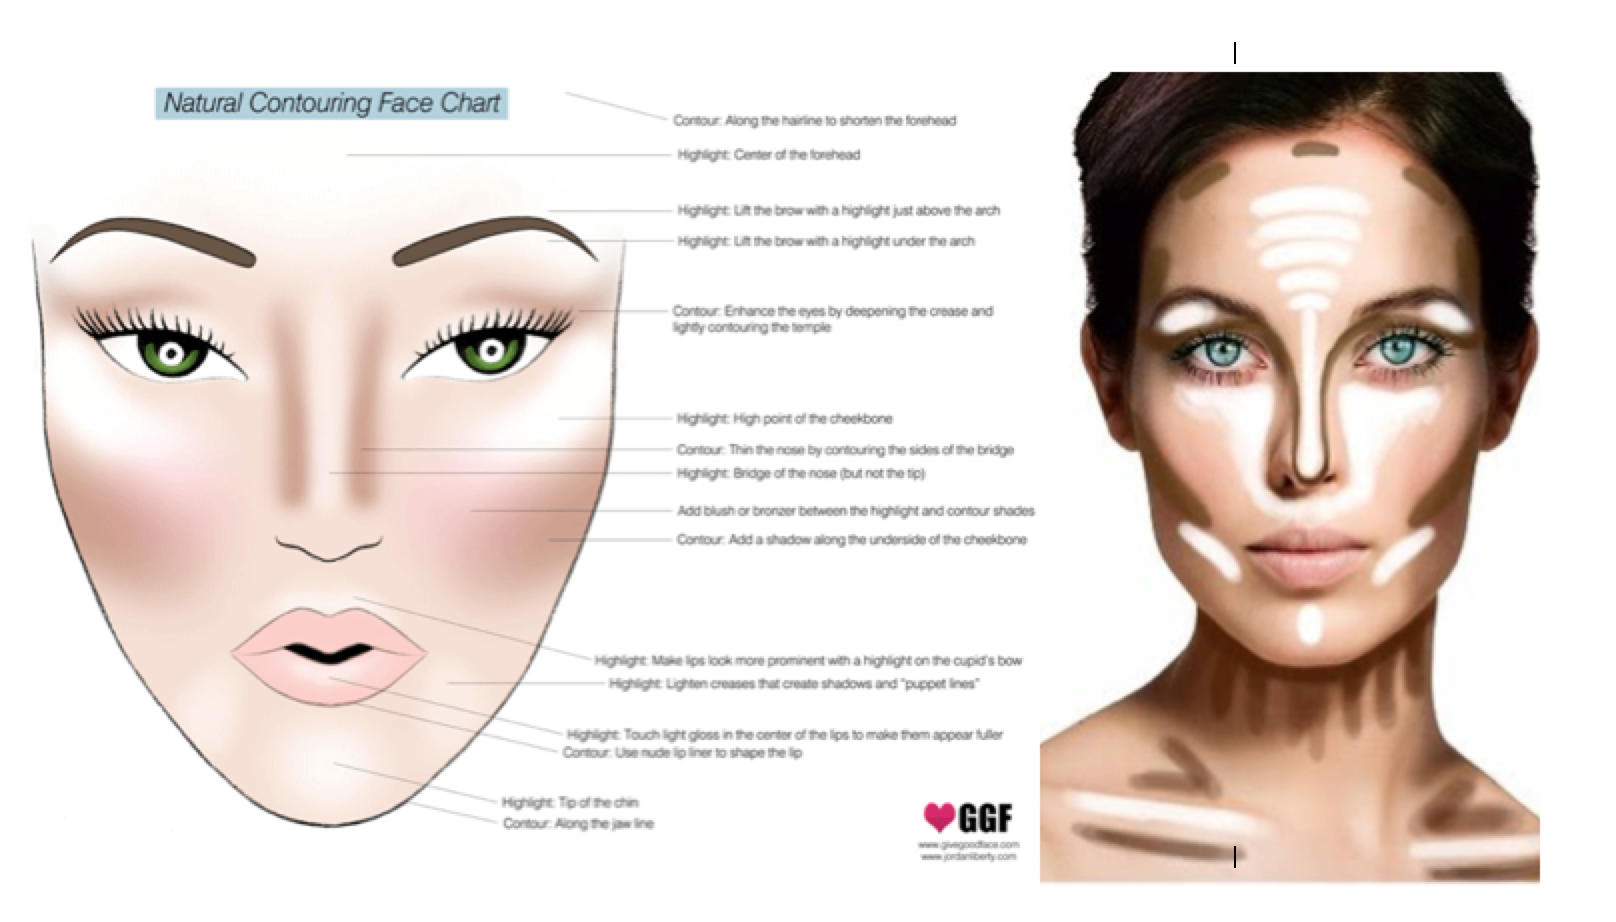

- Apply the contour colour directly underneath the cheekbone, extending from the center of your ear in a slightly downward motion.
- Use a small eyeshadow brush to softly line both sides of the nose.
- Apply your contour colour on under the jawbone. The point is to create a shadow below the jaw.
- Blend the contour colour into the hairline. Doing this helps make the face appear slimmer. Make sure to blend well into the hairline.
- Although the colours may be dramatic and bold, there should be no severe lines. Blend edges well.


